|
This is the well
known Bristol fighter in less well known markings. It was the time of the
First World War raging across all of western Europe. All of western Europe?
Except for
a little country, the Netherlands. Though out the war, they managed to maintain
neutrality, maybe only because nobody was interested in attacking it. Aviation
was one of the many novelties in this war. I will not go into the history of the
air war of WWI, it is well known. As more aircraft took to the skies to battle
each other, more and more of them got lost and some of them came down on Dutch
soil. In total, 62 German, 38 British, 5 French, 1 Belgian and 1 American
aircraft where captured. Many of the unharmed or lightly damaged aircraft found
their way to the new Luchtvaart Afdeling (LVA) or: aviation department. This
resulted in a rapid built-up of an impressive rag-tag airfleet. Even some heavy
bombers, both German and British where used by the LVA. Most of those
aircraft where demolished, or returned to their previous owners after the war.
This particular
aircraft was one of four F2b's that landed on Dutch soil. Registration was:
"BR401 RR250" and had a four bladed propeller. It served the LVA from
1917 until mid 1919, when it was returned to Great Britain. The kit is the
1:48 Eduard one, profipack version. It is actually my very first Biplane.
I
bought this because I wanted to try some of the dreaded 'rigging' I heard so
much about. I was actually shocked once I realized how much of this rigging
there actually was to do on this aircraft! Being a profipack, Eduard kindly
supplied a some PE parts and wheel masks with it, to augment the four injection
molded sprues. I also bought Dutch Decal sheet 48021 to go with it. This was
before I learned that Eduard also had a boxing that offered the same
markings.
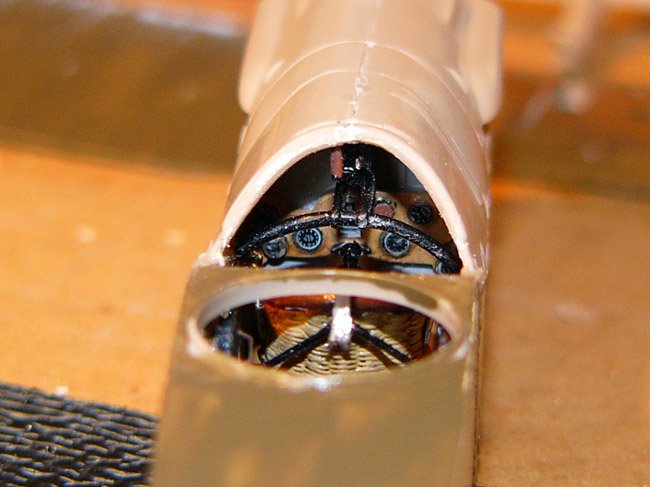
I decided that I
didn't want to use the PE wicker seat and decided to make my own. Although the PE
seat looks nice, it is essentially a 2D (curved) object and I didn't like it. I
read somewhere on the internet that a guy needed two weeks to make such a seat
with fishing wire. But the thing is that fishing wire doesn't like to be bend so
tightly and it springs right back in its natural shape. That's why I decided to
use very thin copper wire, 0.2mm. As I am an electrician, it was easy for me to
obtain this. I finished the seat on a Sunday afternoon, wondering why it
took the other guy two weeks? The rest of the construction wasn't really
exciting. Most parts fit quite well.
The rigging is a
different chapter. I am used to WWII aircraft with the occasional radio aerial,
but this is something entirely different! After studying some articles on the
internet, I saw many models where the rigging appeared out of scale and much too
thick. The same copper wire I used for the seat, seemed to curve when you
stretch it. I then decided to use very thin fishing wire, 0.12mm, which is a
little elastic and so can take some punishment from my own clumsy fingers.
After
some tought, I painted and decaled the aircraft completely before starting the
wiring. I drilled the holes in the lower wing and CA-ed the wires in place.
Of
course with a great deal too much length. I drilled the holes for the struts
in the upper wing all the way through. I then glued the lower wing to the
aircraft body. After that, I glued all of the struts to the lower wing and
hull. The last step was to put all the appropriate wires through the appropriate
holes of the upper wing, placing the wing loosely on the struts. Oh so carefully
I applied CA through the holes in the upper wing secured everything in place.
Of
course I observed the geometry of the whole aircraft throughout the entire process.
Rigging the control surfaces was equally difficult but less challenging in the
way of geometry.
Click on
images below to see larger images
During the build, I
realized that such characteristic aircraft just screamed to be put in a diorama.
I bought a resin pilot figure from PJ productions. The photographer and the
officer where both composed from Eduard's RFC personel set. The photocamera was
scratchbuild with some tin foil, balsa wood, iron wire and small lens from
stretched sprue. I realize that common pilot's pants in those days was not blue,
but it looks nice I think. The uniform of the officer has small insigna's
painted on it with gold paint and a pin. It was also the first time that I
attempted figure painting. It didn't turn out bad I think.
I hope you all enjoy
the pictures. Maybe I should add one or two pieces of equipmet to the diorama,
like an oil drum or a wooden box in the future.
Pieter
|
|