|
1/72 Airfix Apollo 11 LM |
|
Gallery Article by Neil Medcalf |
|
-------------------- |
|
|
|
1/72 Airfix Apollo 11 LM |
|
Gallery Article by Neil Medcalf |
|
-------------------- |
|
|
|
|
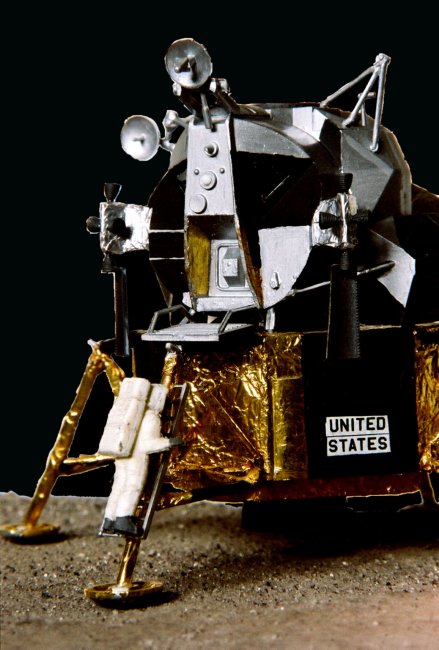
Unlike most of the great modelers who visit and submit articles to ARC, I'm somewhat of a simpler modeler. I build inexpensive ( less than $30 Can) kits. Often I'll buy kits that are under $10. Also I do not own an airbrush so I brush paint all my models with the odd use of a can of spray paint. One of the reasons I build cheap is I don't have the time to spend on extra detailing a kit as my two kids keep me outside 90% of the time! The Airfix LM was such a kit for me as I was able to work on it 5 or 10 minutes at a time. As I normally build aircraft the Space theme was something different for me to do. As I've always had a soft spot for the Apollo 11 mission I decided to model this LM. The fact that the first man to walk on the moon has the same first name as me was just a happy fluke! Yah right! I had to do several hours of research on the net to find reference photos and I came across this site.- http://www.hq.nasa.gov/alsj/a11/images11.html The Apollo 11 Lunar Surface Journal. They have every photo taken during this historic first landing on the moon. More of a surprise was a contour map with all the positions of the photographs taken on the moon. Once all the photos and map were downloaded it was time to build the model. After consultation with the great Alvis about foil I have since become addicted to Rolo's! The foil from the Rolo bars were mounted with 3M photomounting spray. It worked well with no adverse effects to the plastic. Paints used were Humbrol enamels. The only extra detailing besides the foil was the addition of the wire for surface probes to the landing pads.
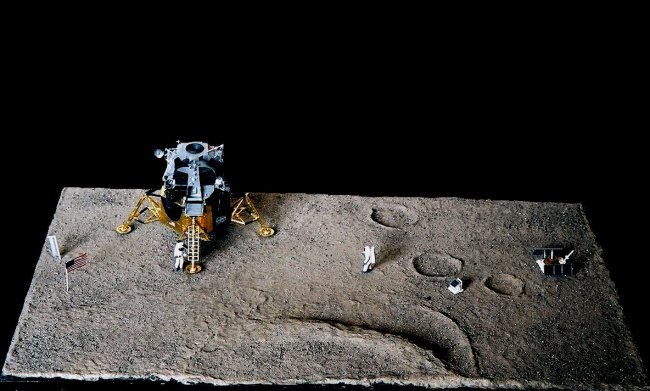
As I was able to find the surface map a display base was a given... I gridded off the map and then drew it out in 1/72 scale. The pine base was then covered with corrugated cardboard with cutouts for the craters and the landing area. This was then covered with newspaper that was shredded in my wife's food processer. ***WARNING*** do this while she's out and make sure you clean up! The ink in the paper is hard to get rid of! The paper was mixed with white glue and applied to the base and smoothed out. As this dried I carefully kept the underside of the base wet to help prevent the board from curving. After the base was dry a coat of white glue was applied and used crushed BBQ coals were sprinkled over the base. After this was dry the excess was brushed off. No colouring was add. I feel it captures the moon surface well. The only regret is not thinking to add footprints in the papermachie base when I moulded it. In the end I re-learned a lot about the Apollo missions and I was quite surprised to find that the total area that Armstrong and Alrdin covered during their mission was so small. The model and base covers about 90% of the general area that the crew covered. They did make an excursion behind the LM as well and a little farther forward to place the TV camera. But overall the area shown is as much as they covered. The positions of the Astronauts is not to any real positions they were in but to fill space and bring attention to the LM. Backgrounds in the photos were photoshoped black. No other "fixes" were done to the model. I hope you enjoy it. Neil
|
|
|||||||||||
Photos and text © by Neil Medcalf