|
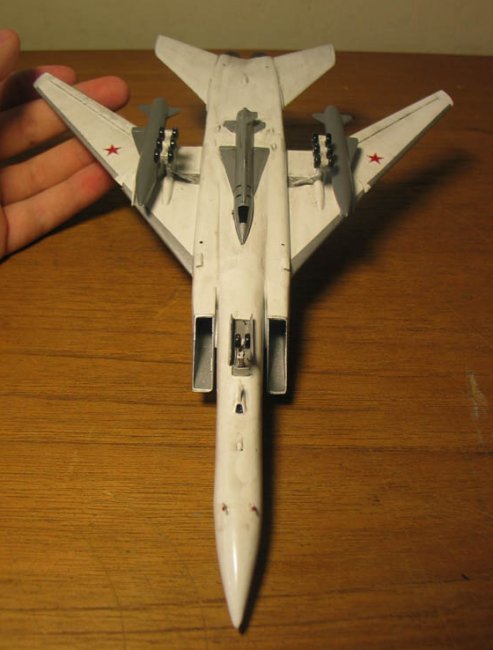
Markings:
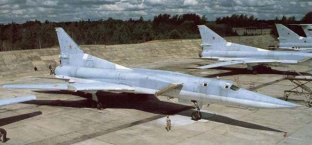
As far as I know, The Tu-22M3 is used only by the Russian Air Force, Ukrainian
Air Force, and Indian Air Force. I couldn't find any decals for the Indian or
Ukrainian Air Force, and I do not know how to make decals, so I stuck with the
ones I had. Theses were pretty simple, with only 6 beautifully make Russian
stars. Before putting on the decals, I gave the whole model a coat of Future so
there would be a gloss coat for the decals. When that was dry, I applied the
decals, and then put SolvaSent on each one to seal it in. It was kind of tricky
to apply the decals because the decal guide didn't have pictures that were clear
enough. I'm glad I had some reference pics for this. The model was given another
coat of Future and I let it dry for 2 days.
|
Click on
images below to see larger images
|
|
|
 |
|
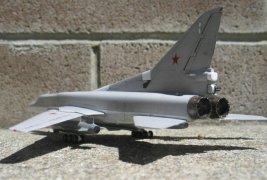
Weathering:
This was my first project where I tried weathering. I didn't do weathering
before because I did not have the products needed, and was too lazy to go buy
some. I finally decided to weather this bird because after all of the reference
pictures, I just could not leave it clean. I took my bike and rode down to
Michael's and got myself some Conte Paris Crayon Pastel Pencils. There are two
pencils in a package, and they cost only about 3 dollars. The tip of the pencil
was enough for the Tu-22M, so it will last you a long time. I used a water
bottle cap for mixing the solution. I used a hobby knife to make the chalk
pastel powder. All of this went into the cap until I had a desired amount. A
drop of water was then added. I mixed the powder and water, and then added a
drop of dish soap to finish off the solution. I mixed everything for about 20
seconds until I got the desired solution. I then took a medium sized brush and
carelessly brushed the solution onto all of the panel lines and parts that need
detail. One way to make sure the mix goes into the panel lines is to brush
the solution across the panel line, not parallel to it. I let this dry
overnight so it would settle into the panel lines.
The next day, all of the black areas were still wet, and this is how its
supposed to be. I started out by taking a little bowl an filling it with water.
I also had 3 napkins, scissors, and some newspaper. What I did first was take
the corner of the napkin and fold it up so I have a thin area. I dipped this
part into the water and let go right away. Then, I pushed it onto the newspaper
so all of the water would come out. What you want is a damp piece of napkin, not
a wet one. I took this piece and started taking off the solution making sure I
don't get anything out of the panel lines. At first, I just mixed the solution
on the whole part I was working on, and the next time I started taking off some.
I kept doing this until I was left with some dark panel lines and some dirt on
the part. When the damp piece of napkin is dirty, I just cut it off, threw it
away, and then started with a new piece below it. I kept doing all of this until
all of the panel lines looked good to me. I still had some of the mixture
in the cap that was completely dry. There were still areas that needed more
dirt, so I took the cap and added a drop of water and a drop of soap. I mixed
this up and went over the panel lines that needed more dirt again. The same
process was done until I was satisfied. This was my first time trying this
"Chalk/water/soap" mix and I think it worked out great. I used The
article in the Tools and Tips section to do this:
http://www.aircraftresourcecenter.com/tnt1/001-100/TNT026_Chalk_Washes/tnt026.htm
With all of
the weathering done, I decided to put on the final coat of Future on the model.
This time, I mixed 1 part Tamiya Flat Base with 12 part Future to give the model
a satin look. I tried brushing it on for the bottom, and found out that this
takes off some of the weathering. I decided to spray on normal Future on the top
and then brush on the Satin Future mix. After spraying it on, I had some areas
where Future was built up and a lot of the weathering areas were wiped out, and
made the aircraft cleaner. I just let this be and brushed on the Satin Future
mix when the first coat was dry. In the end, the whole model had a nice look
that was not too glossy and not too flat.
Final
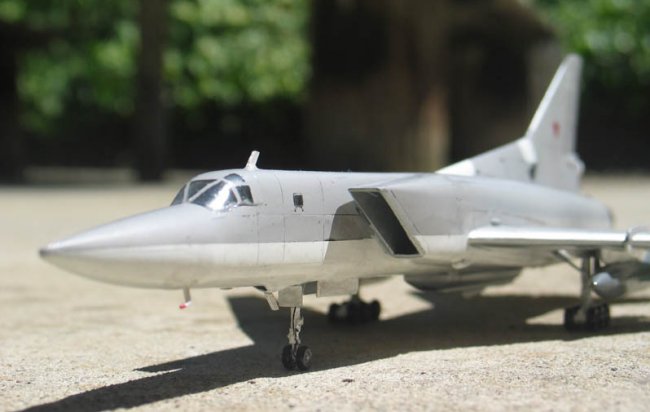
Construction:
The final
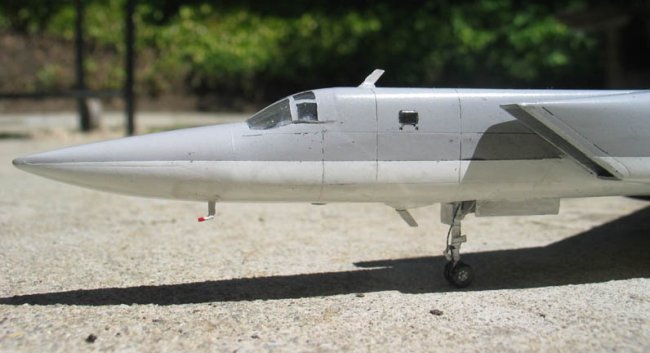
construction was pretty easy and didn't take that long to do. I started out with
the landing gear. There was minimal detail there, so I used some electrical wire
and styrene strips to simulate the wires and boxes on the landing gear. The
landing gear was painted white and the wires were black and silver. I drybrushed
Tamiya Smoke to weather the landing gear. The landing gear bays were also weird
with some electrical wire and was painted Tamiya Sky Grey. The wires ranged from
Red, White, Silver, and Black. The main landing gear doors had to be cut to make
them fit and be accurate. The front landing gear doors are perfect fit.
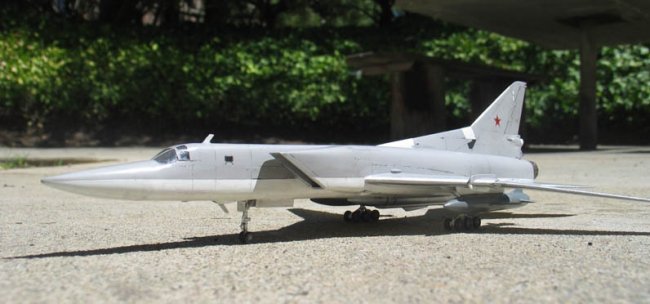
The
second part was attaching the parts that hold the scratchbuilt AS-4 missiles.
This was one of the easiest parts, but you have to watch out for the back,
because if you put glue on the back part, it will stick to the wing, and that's
definitely not good. I used a lot of glue on these parts, because there were a
lot of gaps. I then attached the AS-4 missiles using super glue. After all of
the little antennas were attached, I let the model dry overnight. Then, I gave
the areas that had new parts attached some Satin Future and let this dry for two
days.
|
Click on
images below to see larger images
|
|

|

|
|
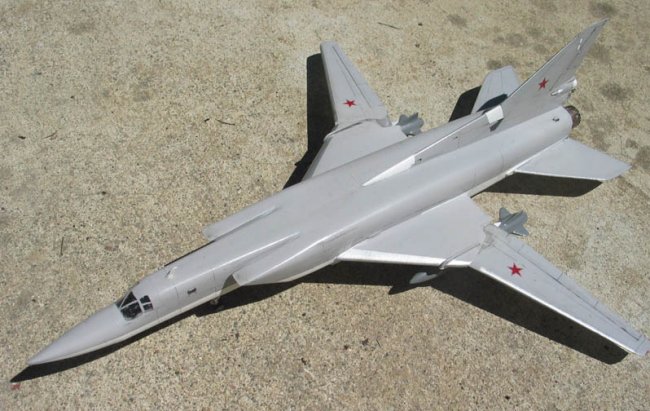
Remarks:
And finally my
mode l was done! After over a month of work, it was completed and I was very
proud.
This was
the first time I tried some new techniques, as it always is with my models. This
was the first time I tried scratchbuilding, which I think turned out
awesome. It was also the first time I used super glue, and I must say it is
the best way to attach really fragile or really large parts. This was my first
time using weathering, and I'm glad I did because its the one of the
easiest and best ways to make the model look realistic. This was the first time I
tried major surgery on a model, which was fixing the whole tail and replacing a
part of the wing that was broken off. It was the first time using Tamiya Flat
Base, which turned out pretty nice. In the end, I used a lot of new techniques
that I will surely be using in the future.
|
Click on
images below to see larger images
|
|

|

|
|
This model was
finished in a little over a month, and I thick it deserves all of that work. On
the 16th annual IPMS Central Valley Scale Modelers Show and contest on August
15th, 2004, this model won 2nd place in the Junior Aircraft section. It was beat
by my 757, which I think is unfair, because personally I think the Tu-22M was
much better. But hey, I cant change it now!
Dmitriy
|
|