|
Sometimes you need a fun easy kit to go in between the super detailed kits, this
is one of those.
I actually started on it a long time ago and put it aside after
completing construction but before I painted. As I remember it went together
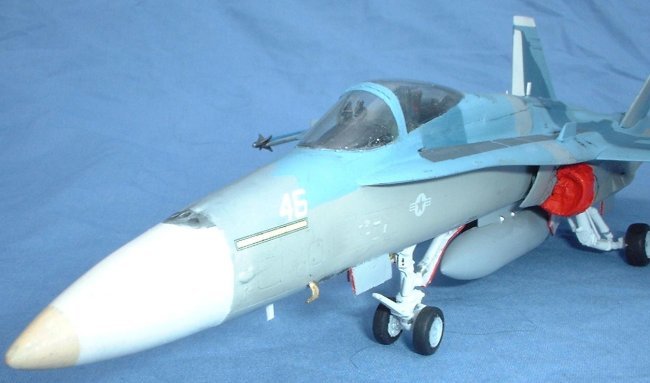
easily and I kept it simple with no extra details. I closed the canopy because
the cockpit was very lacking in detail with a decal instrument panel, I did add
some straps (made from Tamyia masking tape) to the seat. I also left off the
ordinance and pylons since NSAWC jets fly with very little hung under their
wings. The intakes are also lacking, with a wall just inside a poorly fitting
intake lip, that's why I made intake covers.
|
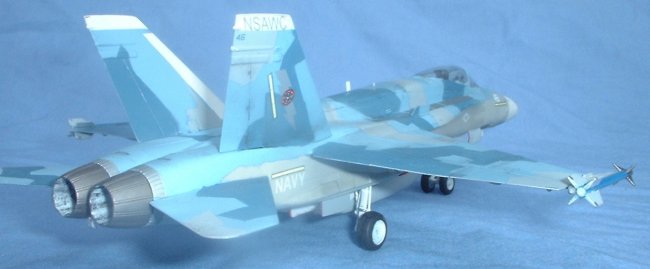
When I got back to the kit a year after putting it aside, I only had to
paint, but since I was doing a NSAWC Hornet, the painting would not be
easy. But I did make things a bit easier by taking a short cut on the
complex splinter scheme. I brought the kit and the decal instructions into
work one day and used the photocopier (shh, don't tell my boss) and blew
up the instructions to the size of the kit. Using the kit sized templates
I was able to make masks for the kit by tracing a fresh #11 blade trough
the paper and onto the masking tape, creating the perfect sized mask. I
used 3M blue low tack tape for this, and laid a piece out on my table and
put the photocopy on top. I used Tamyia tape for the smaller area masks. |
Click on
image below to see larger image
|

|
|
I used
Testors paint for all the colors, but I had trouble finding the right FS match
for the light blue and I had to custom mix it using a pic I had of the real
plane in World Airpower Journal. Sealed with Future of course for decal prep.
The hardest part was
all the masking!
|
Click on
images below to see larger images
|
 |
 |
The Two Bobs decals went on next, and
there really aren't many of them and it went quickly. It's been said many times
what a high quality product 2 Bobs make, and these were just as great as any
other decal they make.
| I
do wish that Two Bobs would make better instructions though, sometimes it
can be confusing trying to pick out things on the small four view drawings
(which are great for painting) I just would like a separate decal
placement guide (I would be fine in black and white too). Don't get me
wrong, I love what 2 Bobs does (I should say one Bob now) they are great
guys and provide better decals than anyone else, hands down! That's why I
have so many of their sheets and can't wait to build up kits for all of
them (I have 5 F-18 kits waiting for those cool OIF decals I collected). I
weathered with chalk pastel sludge and sealed with Testors Flat coat. I
made the intake covers out of Aluminum foil. |
Click on
image below to see larger image
|
 |
|
|
It took me only a few weeks to build (with a one year shelf sitting in the
middle) and it was fun. I might someday build another of these so I can use the
other half of the decal sheet, a much easier way to have some cool aggressors
than doing it in 48th. Hope
you all enjoy!
Everett
|
Click on
image below to see larger image
|
 |
|
|
|