|
F
18 A HORNET IN SPANISH SERVICE
MODEL
HASEGAWA 1/48 SCALE
THE
PLANE:
The
Hornet is the type of plane you immediately like or dislike. It was built to
take the place of the Phantom, which already was a good general plane, and
slowly it also came to replace the Intruder, a very specialized model, even
though not completely successful owing to its poor range.
To get round those problems (without questioning the soundness of
the planning) the Super H was developed, but this is another matter
story.
IN
SPAIN:
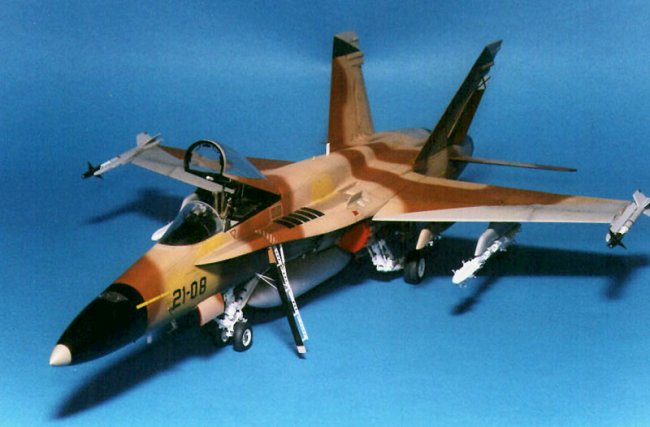
In
1995, the Ejercito del Aire decided to make up the amount of its Hornets with 24
single-seater and 6 two-seater planes
formerly belonging to the US Navy.
Among
the first 6 planes delivered, (F18 A, later upgraded to A+ standard), there were
3 models coming from VA 127, equipped with a beautiful
aggressor camouflage. After their arrival in Spain all the US decorations
were covered with colours similar to the original ones, except for the areas
painted in Desert Sand which were covered with Spanish camouflage yellow, thus
giving a new colour to the wonderful camouflage.
On my photos there are only the national banners on the fuselage, and not those
on the wings.
I
have the slight sensation that many pilots would have fought each other to drive
one of those machines.
THE
MODEL:
The
Hasegawa kit came out about 11 years ago and so it
belongs to a very peculiar period, when the market was crammed with very
expensive kits full of gadgets. That’s why inside this kit can be found
photoetched parts as
well as soft metal undercarriages. And to be honest with you I would have done
without the undercarriages, considering their shape and all the trouble I had
in removing the small and nasty melting lines from all the pieces.
The
model is beautiful, with delicate
brush work and a kind of plastic very easy to work. The main problem during the
assembling is the taking apart of the fuselage side walls together with the
inaccuracy of the air intakes assembling. Moreover I had the problem of the many
sprue round bars I was forced to insert inside the fuselage to make it stronger,
thus avoiding all the fillings to
come off.
Other
negative aspects are both the poor depth of rear bay
of main landing gear and the lack of a real air intake pipe.
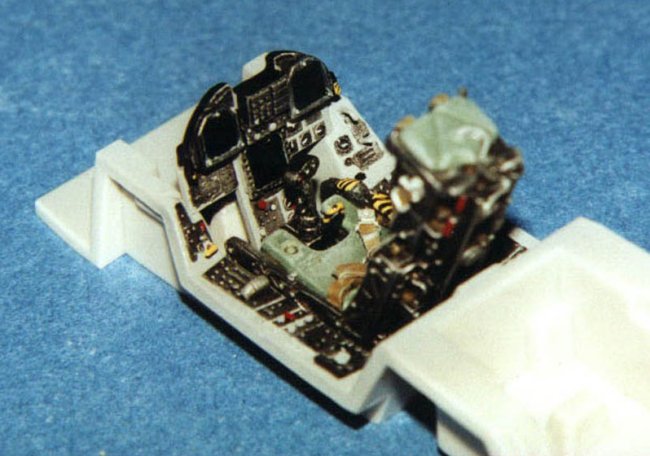
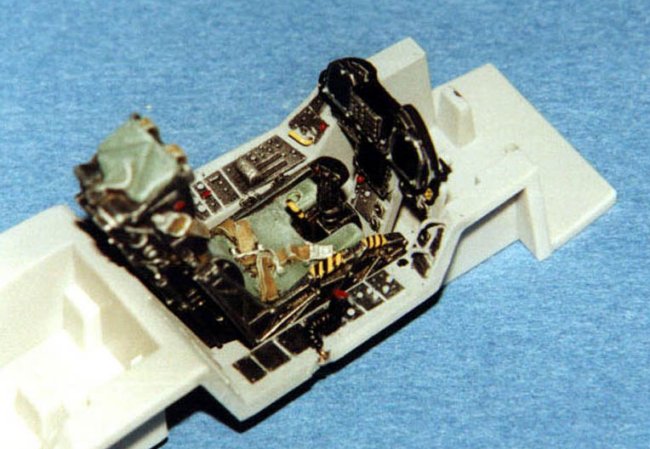
I
used the interior parts from the
box and photoetched elements are very few seeing as in contains parts they were
useless and sadly bi-dimensional. Only the seat by Verlinden
was made of resin. All
the rest is built in copper wire
and plastic. The canopy interior was detailed by adding the internal frame. It
was necessary to show the visible rivet which runs across it
and to add the handles and the rear-view mirrors.
The
photoetched ramp has been modified by eliminating some plastic parts which
otherwise would have made it
thicker. All the actuators were built by using syringe needles in different
sizes. The bay was built by hollowing the same plastic cover provided in the
box. I built the small internal spaces you can see inside by using a small
cutter.
|
Click on
images below to see larger images
|
 |
|
THE
VERSION:
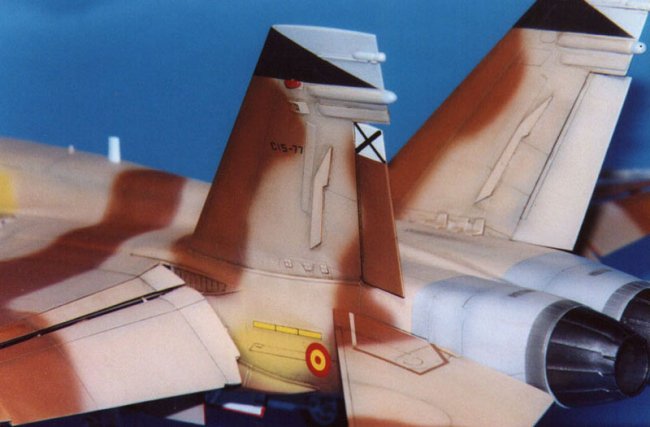
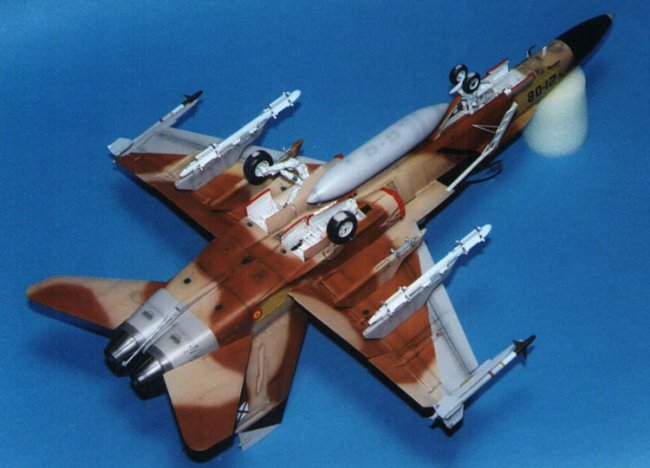
In
the pictures of the magazine Aerei 2/93 the same planes are always shown without
external loads, except for the pod of
the ACMI system. At that time they had not (installed) on their drifts what seam
to be structural reinforcements in the shape of a broken arrow, which later
appeared in Spain; this was the evidence of
a rather stressed use oh the planes.
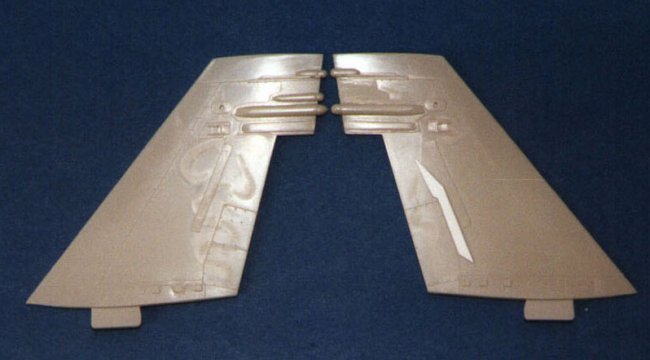
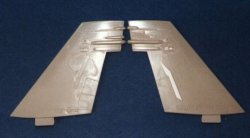
| All
the ECM aerials are lacking; they belong to the C version and should
not be assembled. In this version the second spindle from the top
must be eliminated from the drifts (see picture). At the bottom of the
drifts, on the outside, you
should add the thin junction between fuselage and drift; a small 0.2
Evergreen strip will do to
simulate it; then it should be touched up with a light rub of sandpaper. |
Click on
image below to see larger image
|
|
|
There
are low viz lights on the drifts, but they are covered by camouflage.
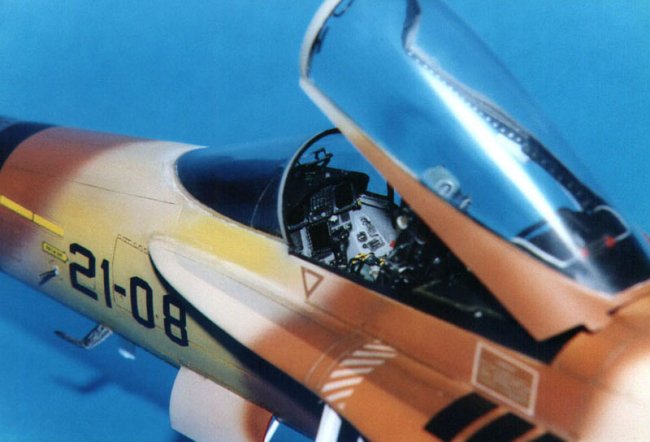
COLOURS:
At the beginning H’s colours had to imitate Iraqi Mig 29. Gray is very
important in touching up the shades. The faked air intakes painted over and
below the LEX and on the fuselage are original.
After
the arrival in Spain all the Iraqi/American emblems where removed, together with
other signs like pilots’ names and so on. During this operation part of the
stenciling was removed too. The green stripe at the bottom of the plane between
the engines, peculiar to many aggressor in other Units, doesn’t seem to exist
on those planes. I noticed it on the pictures of VA 127, and so, having some
doubts, I decided not to paint it.
At
the beginning I thought I could use decal paper Aztek Latin Eagles II where my
model was very well shown, but its very high cost in Italy forced me to give up.
Later I started considering the
Twobobs
Aviation Graphics
48-02 paper which had a model with the same camouflage and
stenciling. Unfortunately after buying it I realized that the paper was useless,
seeing as only warning triangles in the air intakes (which moreover where
overpainted to use the same colour)
and a few other stencils could be useful. I preferred to personally paint the
faked air intakes, owing to the fact that they
had a slightly trapezoidal shape and not a rectangular one. Moreover, one of the
biggest problems was given by the arrangement of black and gray at the top of
the drifts. All the other transfers like codes, emblems and so on, were taken
from the spare parts store.
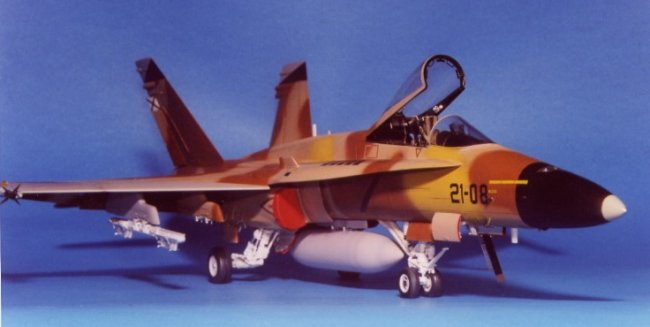
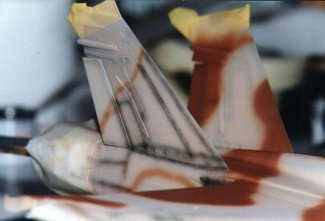
Unlike
planes coming from other units, on those planes camouflage seems to be quite
soft. As you can see in the picture, on my model I decided to paint it free
hand.
|
Click on
images below to see larger images
|
 |
|
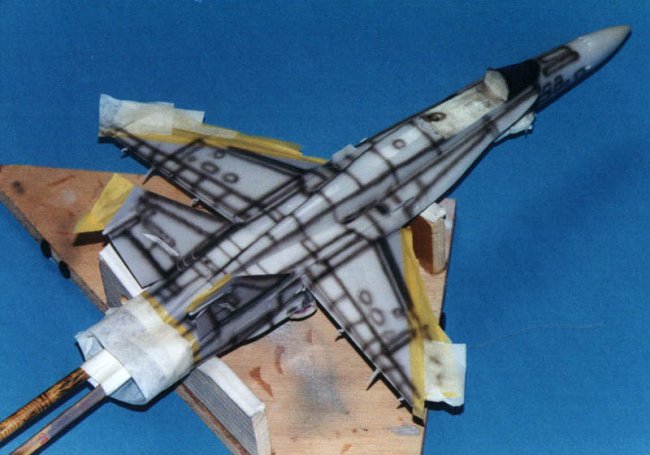
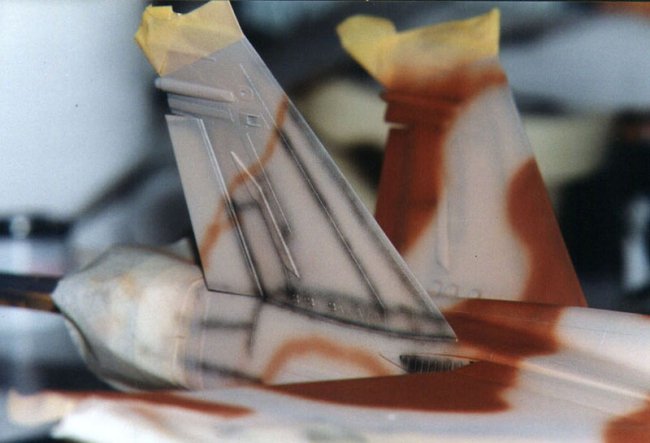
I
started by giving the gray areas a FS 36320 pre-shading and then I painted them.
Then I covered them and I gave the camouflage areas a very heavy pre-shading.
After spraying FS 30279 desert sand I marked with a spray-gun the brown FS 30117
areas, and before filling them up I went over them again with a pre-shading. The
procedure is arduous but enjoyable, because step by step the plane gains in
tonal depth. The radome black part extends towards the back, as far as the low
viz lights.
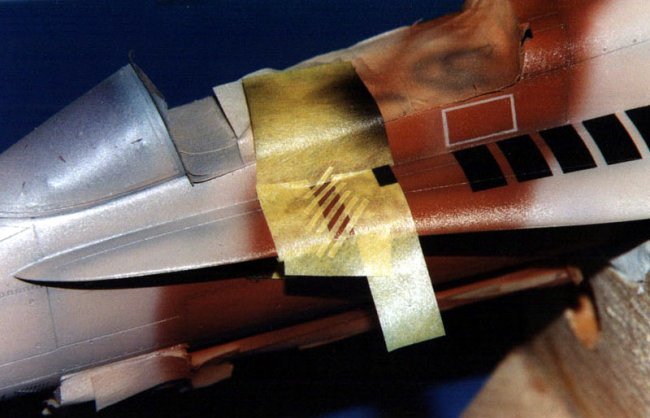
Then
I painted the faked air intakes and the stenciling. Before their arrival in
Spain the anti-slip areas above the LEX couldn’t
be seen; they will become visible later, even if
hardly outlined. I painted them very very lightly in matt black. Actually
it’s not a real paint, but an anti-slip paste which seams to be run with a
roller. Using as much as possible the pictures as a guide I painted several
areas in yellow; it was obviously done in
free hand because
as you can see the paint work isn’t precise
in some areas, like between the fuselage and the LEX. To erase emblems on
brown areas the Spanish used a very
similar colour; in some points it’s imperceptible, but actually it’s slightly
lighter. It must also be taken into consideration that Sidewinder’s rails upper surface is
coloured in FS 36375, while the lower one is painted in FS 36320.
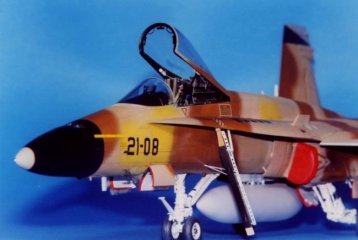
The
whole plane has been sealed with several hands of Gunze clear cote. After
sticking the decals I gave a light
coat of Lifecolor clear cote and later I oil-washed it with Terra d’ombra
bruciata blended with Blue Oil. A few days later I gave two very light coats of
Lifecolour clear satin.
Francesco
|