|
Hawker
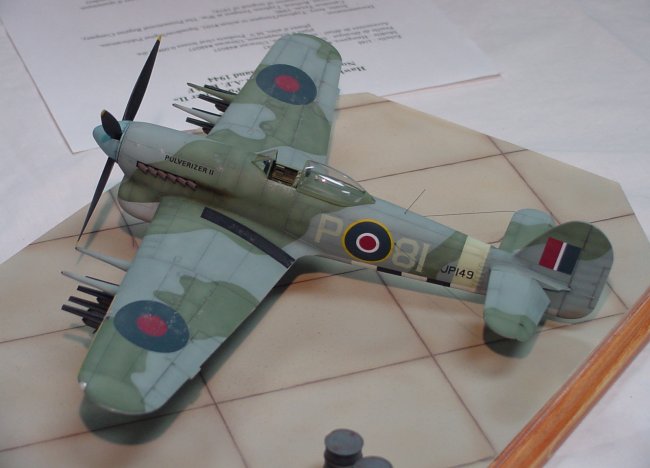
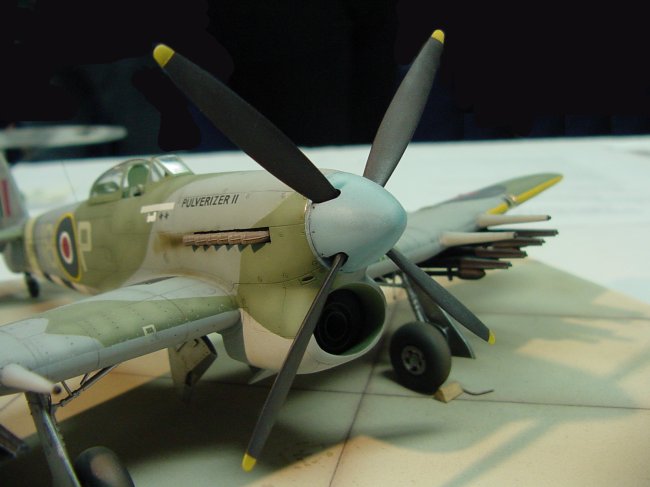
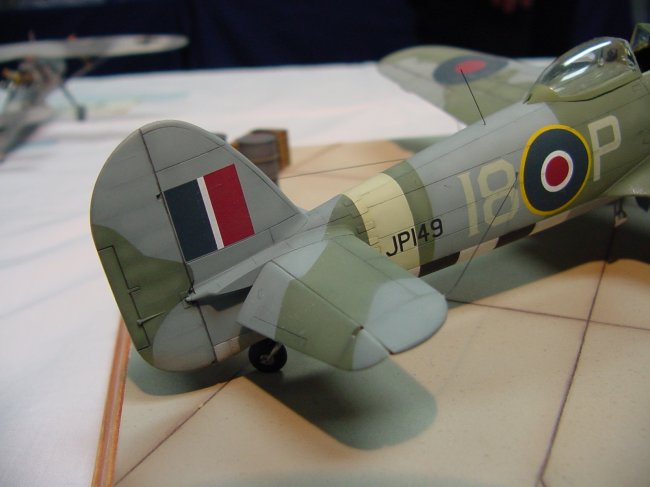
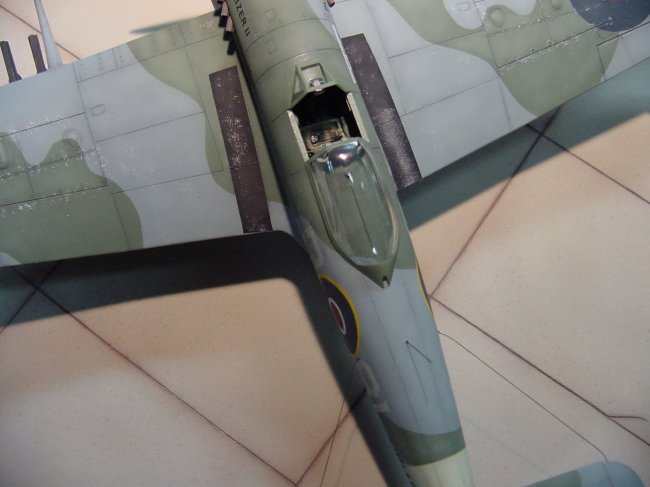
Typhoon Mk1b, «Pulverizer II»
No.
440 squadron, 2nd T.A.F. RCAF
Eindhoven,
Holland 1944
Hi.
My name is Sylvain Couture. I have been modeling since I was a kid. I’ve been
going more seriously at it for the last 10 years or so. I work as an aircraft
engine inspector for Rolls-Royce Canada in Montreal. As you can see, my job is
an extension of my hobby. 
This
is my latest kit. I’m really happy because it has been a while since I’ve
actually finished one ( yes, I have that problem to...). This is Hasegawa’s
1/48 Typhoon MkIb ( #09379). Remember the old Monogram kit.....well forget it!
If you want a hot Typhoon, Hasegawa’s kit is the real deal. It’s not
perfect, but with a little effort you’ll get stunning results.
There
are two main problems to address.
First is the hideous gap in the radiator intake. I took care of it with miliput
and a lot of patience. Second is the fit of the cockpit sidewall inserts (call
it what you want). This feature allows you to build either a «car door type»
or the bubble version. The fit is not good. It took a lot of gap filling super
glue and rescribing to get it right. The rest is right on.
|
Click on images below to
see larger images |
 |
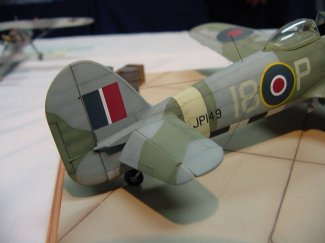 |
I
added a lot of detail in the cockpit: switch boxes, levers, rudder pedal adjustment,
control stick torque tube, wires and a resin seat from Ultracast (#48057). I
replaced the kit’s exhaust with resin ones (Ultracast #48057). I dropped the
elevators, detailed the landing gears and scratch built the radiator flap
actuator. I encountered problems with the canons. The ones in the kit were
fragile. I scratch built new ones with stretch sprue and aluminium tubing. I
also replaced the wing lights with clear lenses (M.V. Products,
0.096in dia.). Electrical connectors were added to the rockets with
copper wire and stretch sprue.
I am very fussy when it comes to
decals. The kit’s decals are thick. I used a sheet
from SuperScale (#48-543) that I had bought seven years ago for the
Monogram kit. They went on just perfect. I used Solvaset decal solution (yes
Rick you will get your bottle back...one day) because it’s the best simply the
best stuff. I didn’t have any reference pictures of the specific aircraft, so
the order of the ID codes on the port side was an «educated» guess. I painted
the invasion stripes and the fuselage band. The main colors are from Testors MM.
I thought that by buying the Testors RAF colors they would be correct. I was
wrong. I had to remix them to get
it right. Next time I’ll go with Humbrol colors.
I don’t believe in clean WW2
fighters. I use several weathering techniques. Underneath I do pre-shading. Top
colors are faded with postshading. Delicate washes are used to accentuate panel
lines. A light dusting is done underneath with my airbrush and Tamiya flat
earth. I also toned down the decals after the final flat coat with light gray
pastels. Pastels are also used to simulate streaks aft of several hinges on the
wings. Exhaust streaks on the side of the fuselage were done with airbrushed
sepia water ink.
Finally I wanted to add a touch of
life with a tarmac and some eqiupment. I made the tarmac with cardboard, painted
with Tamiya acrylics. The barrels and the wooden crate are resin parts from
Custom Dioramics (1/48 #CD-311).
I
had a load of fun with this project. Hope you enjoy.
Sylvain
|