|
The
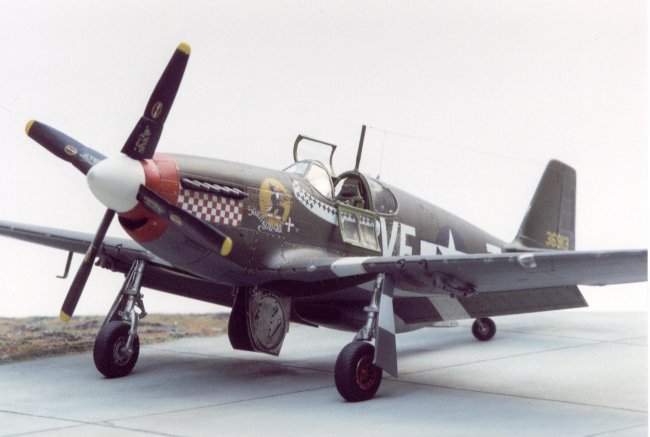
kit used to build this model was the Tamiya 1/48th scale P-51B. I
finished it in November 1996.The model was built almost straight from the box.
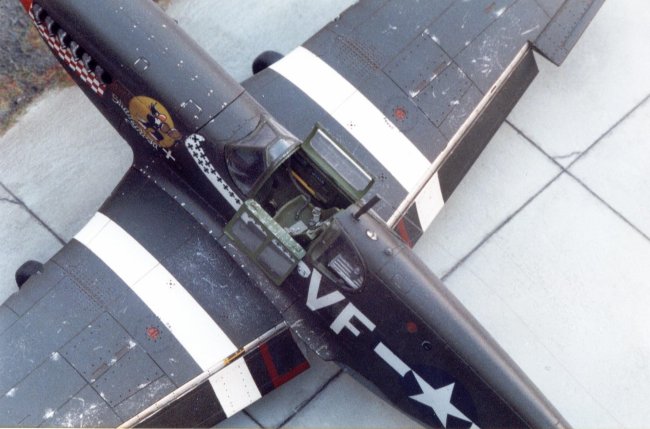
At the moment of building I didn’t realize the cockpit as depicted by Tamiya
was not correct for this sub-type so I used it unaltered. To be honest, the
curved cockpit floor isn’t really visible when you look in the ‘pit of the
finished model but the configuration of the control stick and it’s linkage is.
The best option is to use the True Details resin set which addresses the
problems of the curved instead of wooden floor and it also has the right setup
for the control stick. The reference I used was the “Walk-Around” of the
P-51D together with the “P-51 in Action”. My reasoning at the time was that
because of the same engine and such, the difference between the –B and the
–D were almost non-existent aside
from the canopy, fuselage spine and the armament. Oh, well...
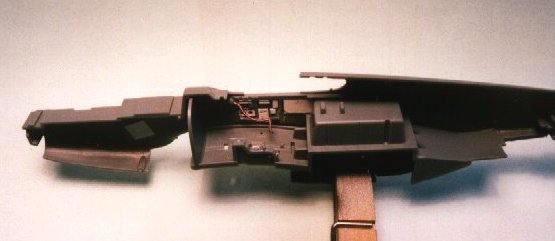
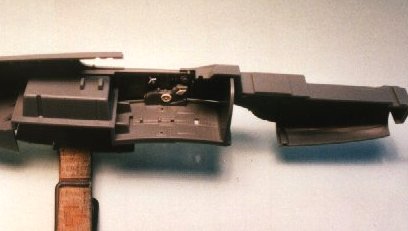
In
the cockpit I added a trimwheel, a yellow arm (emergency landing gear control?
Still don’t know…), the detail for the flare pistol port, map case, wire
from the antenna lead-in to the radio, oxygen hose by winding thin copper wire
around a thicker wire and Eduard seat belts. Looking back, I should have added
some additional details to the hinged part of the canopy too! But that’s the
learning curvature in modelling, isn’t it?
|
Click on images below to
see larger images |
 |
 |
| The
model falls together like a dream. There are no difficulties in the
assembling process that I encountered. I just added some finer details and
refined some oversimplified parts. For instance, the exhausts need
drilling out, as do the towing eyes inboard of the main gear struts. I
replaced the “blobs” at the front of the main gear by two plates per
gear leg with a hole drilled in. Of course, the compulsory brake lines
were added
too. To make the model less static I cut off the tail wheel and glued it
back off-center. For the antenna wire I used the thinnest (dark) fishing
line I could obtain.
What
I found was one annoying feature in this kit was that when built up, a
seam line was visible inside of the radiator outlet walls. These sides
were covered with very thin plasticard. The radiator outlet flap received
an actuator arm.
|
| Click
on image below to see larger image |
 |
|
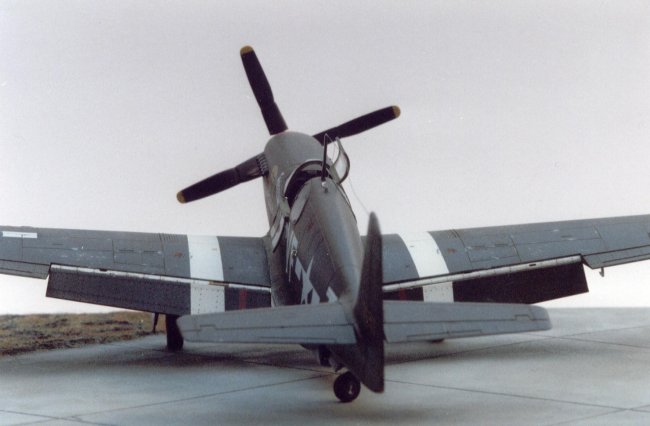
Paints
used were Tamiya’s. I airbrushed the white ETO-stripes on because that gives a
much more convincing result than decals. I believe that to be correct with these
markings, the spinner should be all-red. In any case, the dividing line between
the red and white of the spinner was very sloppy during the short time this
aircraft had this feature. Weathering was done with pastels for the exhaust
staining and the guns, while a very light wash with Raw Umber took care of the
panellines. The inner gear doors received a light coat of Tamiya Smoke which
gives a wash-like effect.
The
decals are Tamiya’s kit decals. On the photographs the antenna wire is a bit
slack, this is because at the last local IPMS-meet the antenna strut broke off.
I reattached it with CA, but couldn’t get the tension back in the wire at that
time. Next I tried applying heat, but PINNNNNNGG! And then I had two wires…..
Finally I cut off the remains, drilled back a hole in the vertical tail and
spine and rigged a new wire. It now sits in the display case in all it’s
splendor…
I
hope you liked the article….. And now: shut off that computer and start
BUILDING!!!!!!! ;^)
Erik
|
|