|
"British Seaking in the Gulf War"
History
In June 1966, British Government approved the
Westland Company to license Sikorsky’s Seaking to become part of the Royal
Navy and Royal Air Force aircraft.
From that time, UK firm secured the right to
build, develop and modify the Seaking to fit the RAF and RN standard. Now with
production more than 300, the Westland Seaking family is a central feature of
naval helicopter operation until the new EH 101 is fully developed.
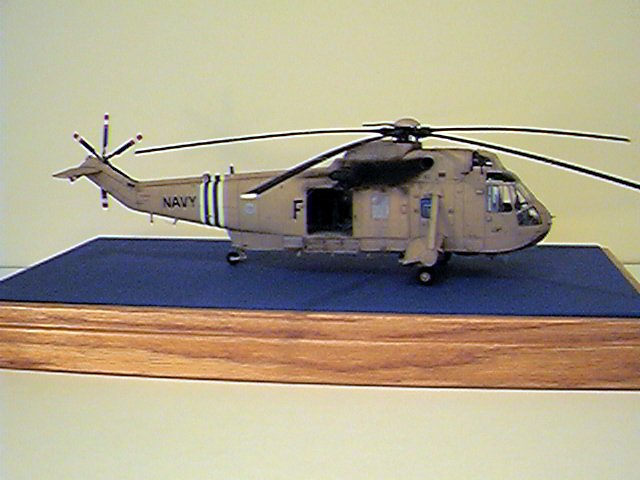
The Seaking HC.Mk 4(the one I built) is based on
the HAS.Mk 2 powered by uprated Gnome H.1400-1 engines with strengthened
gearbox. The HC-4 served as a troop transport from the fleet to the inland. It
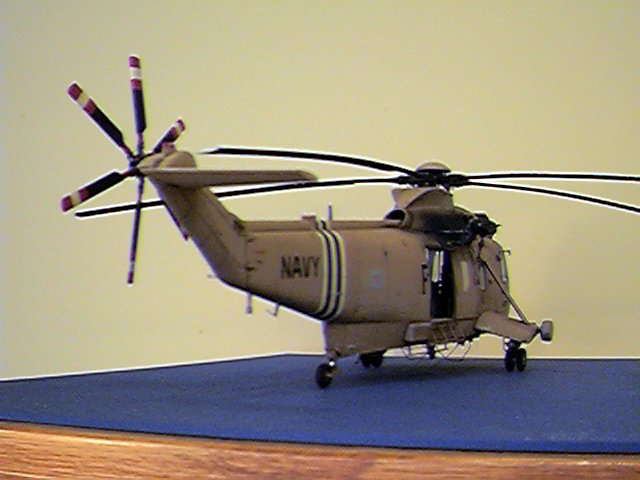
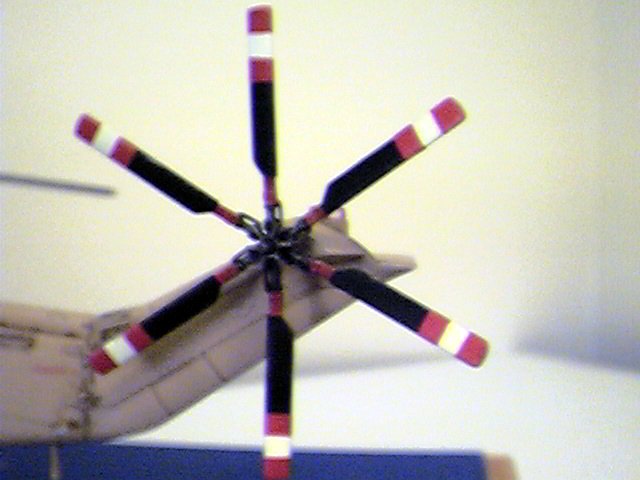
got a six blades rotor at the tail and the only weapon on board is a single 7.62
GPMG near the main cabin door, it is also no sponsons on each side of the
undercarriage. However, it equipped with an AN/ALQ-157 IR jammer and NVG-compatible
cockpit lighting. The cabin can fit 28 fully equipped soldiers and 2 pilots.
The Model
The Seaking I built is based on Hasegawa's 1/48
SH-3H which was released in1995. The first disappointment when you open the box
is no interior of any kind in the kit. Secondly, the main cabin door is moulded
with the fuselage in one piece, that means if you want to open to display the
interior, you probably near two kits . Finally, the price is way too high for a
48 scale chopper, but if you are a fan of Seaking in that scale, there isn’t
any choice other than Hasegawa. On the plus side, the Seaking is beautifully
moulded in grey colour with excellent recessed panel lines, crystal clear and
thin canopy is always expected , colorful marking on the decals . Well, what can
I say, it is typical Hasegawa style.
Modification
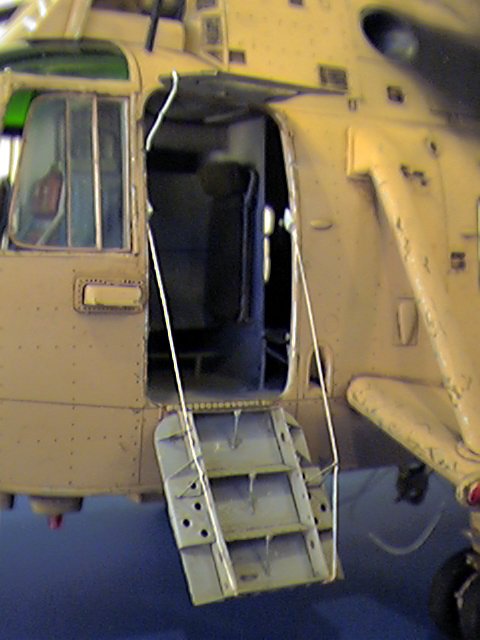
In order to change an American Seaking to British
version, I had to do the following, First, I wanted to open the cabin door in
order to show the interior, that means I had to scratch build every interior
behind the cockpit area, I am not go through with detail, all I need is styrene
strips and plate, brass strip for seat hanger, aluminum foil for the seat etc.
There are some photos to show the process.
I cut out the main cabin door which
has to be smaller than the frame, but before I do that, I scratch built exact
side of the same door by using styrene plate. I also opened the pilot door and
replaced by photo-etch from Eduard. I superdetailed the cockpit area including
some switch and handle.
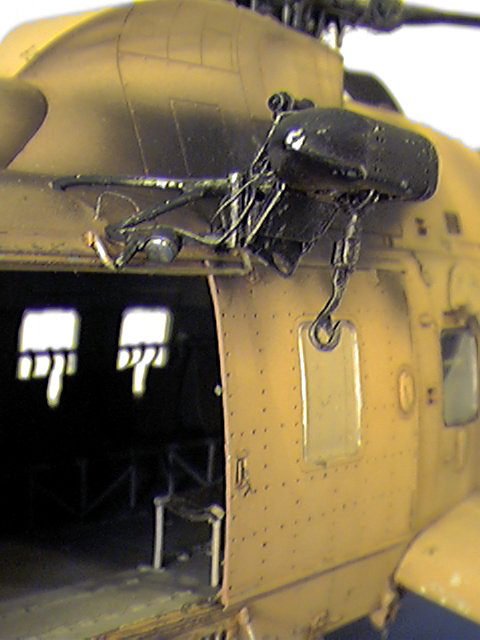
For the exterior, because there is lot of difference on
the HC-4 version, I brought a conversion detail set from the Flightpath which is
a cottage company from UK. The set is made of large photo-etch and white metal.
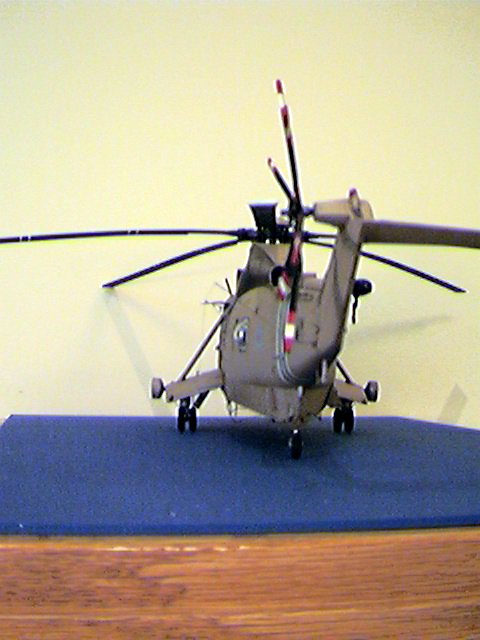
It contains a six blades rotor, commando-style undercarriage, foot steps to the
cabin, folding tailboom , AN/ALQ IR jammer plus a lot of different detail. You
just have to be patient to do it.
Painting
All the interior has to painted before the
fuselage is joined together, I painted the interior using Humbrol Enamel ( which
in fact the only brand I use ) #64 light grey, I let it dry for few days, than I
did a overall wash, and later the drybrush . The passenger seat is #86 (light
olive) and pilot seat is #178 (British Scarlet). After the fuselage was done, I
painted it an overall British Desert Pink from Xtracolor #32. The invasion
stripe is painted by carefully masking technique, also the tips on the main and
tail blades. The machine is given an overall wash by using oil paint, what I did
is thin down the Raw Umber and apply on the fully dried surface section by
section, wiping it off using clean cloths. The panel lines will show very
clearly. There is quite a lot of photos show that this particular machine is
very dirty during the Gulf War, so don’t hesitate to do some heavy weathering.
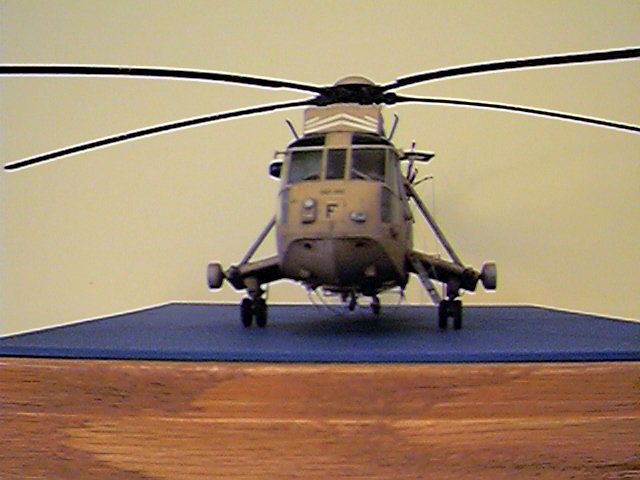
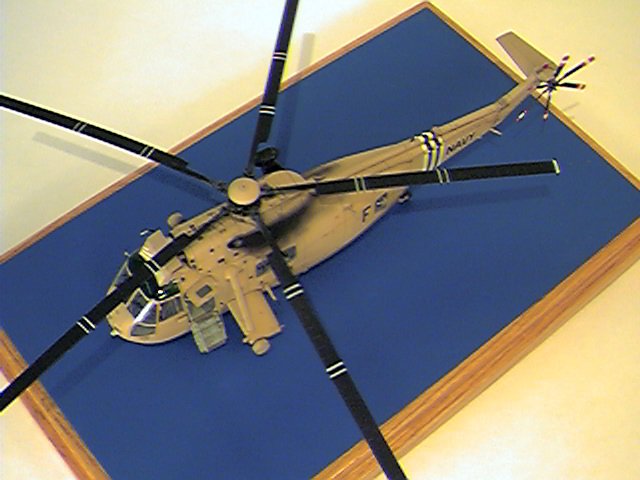
Markings
This machine belonged to the 845 Squadron of the
Royal Navy serial number ZG820F. However, the Navy seems to simplify all the
insignia, it only has the low-vis British roundel, an letter F for serial number
and NAVY for insignia, and also the D-Day invasion strip for identification.
Because there isn’t any decal sheet on the British Seaking in the Gulf War
subject, I have to use other similar decals.
Conclusion
The whole project took me about 4 months to
finish it, I can’t say it is an easy project because a lot of research is
needed . However, I enjoyed every minute . I particularly like the British
subject due to my background, I hope anyone of you can have the same feeling.
The model has won a first place in 1996 IPMS Edmonton Annual Contest, first
place in 1997 RMMC Calgary, first place in 1997 IPMS Vancouver. It also won the
Best Aircraft and Best of Show in 1996 IPMS Edmonton Annual Contest.
Ricky
(Click on
the image below to load the full size photo. Use your
back button to return to this page after viewing full size photo.)
|
|