|
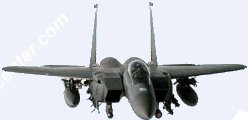
The Persian Gulf War brought about the combat debut of many aircraft, and one of the most
notable of these is the F-15E Strike Eagle. Developed from the F-15B/D airframe, the F-15E
is a true 'all-purpose' aircraft, being able to deliver a large variety of weapons
payloads to the target, and fight its way in and out of hostile territory without the need
for fighter escort or Wild Weasel aircraft. It is capable of doing so through major
upgrades to the aircraft's avionics platform and airframe, and carries its air to ground
ordnance on twelve fuselage hardpoints located under the engines and on the CFT (conformal
fuel tank) pylons. Another major improvement over the previous versions of the Eagle
include the Martin-Marietta LANTIRN (Low Altitude Navigation and Targeting Infra-Red
Night) system, which gives the Strike Eagle true night/all weather capability. These pods
are mounted under the engine intakes on hardpoints, and dramatically enhances the Strike
Eagle's capability to deliver its payload anywhere, anytime. The F-15E's performance
during Operation Desert Storm was highly successful, and the aircraft maintained a 95.8%
mission ready rate throughout the conflict. Considering all of these factors, the F-15E
remains a powerful and deadly accurate weapon in the USAF inventory, and will continue to
serve well into the next century.
The Kit
After building several F-15Es in 1/48 scale, I finally decided to have a go at the big
Tamiya kit. This is one kit that is truly all-inclusive, and can be built into a highly
accurate replica of the Mud Hen without any aftermarket accessories. The only thing
missing from this kit is a second 600 gallon fuel tank, so that one can be carried on each
wing (Most Strike Eagles flown in the Gulf carried a pair of tanks on the wings, and left
the centerline empty, contrary to the kit's suggestion for centerline placement of the
tank). Despite all the justified praise, the Tamiya kit is not exactly a 'shake and bake'
kit, and there are a few fit problems along the way, which we'll address in this article.
So, after collecting all of my references, it was on to the workshop to begin
construction.
Planning and Construction
When building a kit of this size and complexity, it's a good idea to plan ahead. The first
order of business was to complete all repetitive assemblies, which I found was a great
help in cutting down the building time later in the project. I assembled both wings,
tails, LANTIRN pods, weapons pylons, intakes, and exhausts prior to the actual build. It
may be a little tedious at this point, but it does pay off later on down the road. I also
assembled all of the weapons, and separated the Rockeye cluster bombs, bagging them
separately. There are subtle differences in the bombs mounted on the left and right
CFTs,
and on the long rails, so it's a good idea to keep them separate.
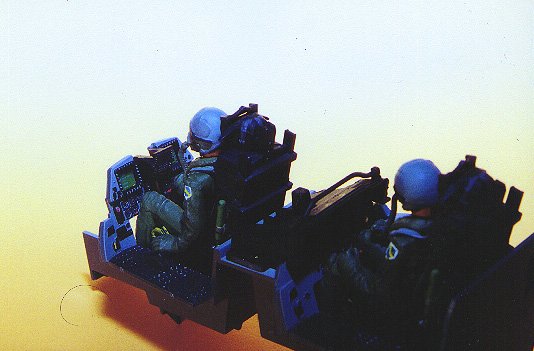
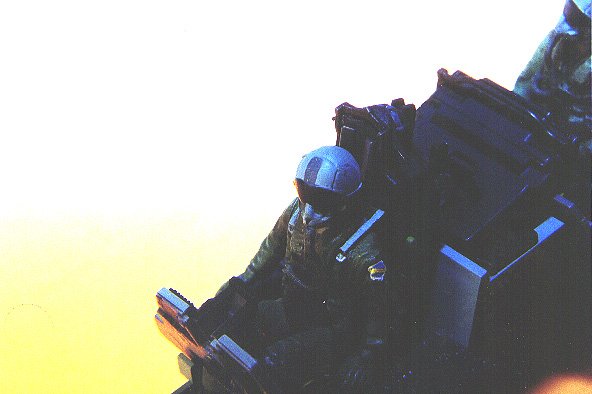
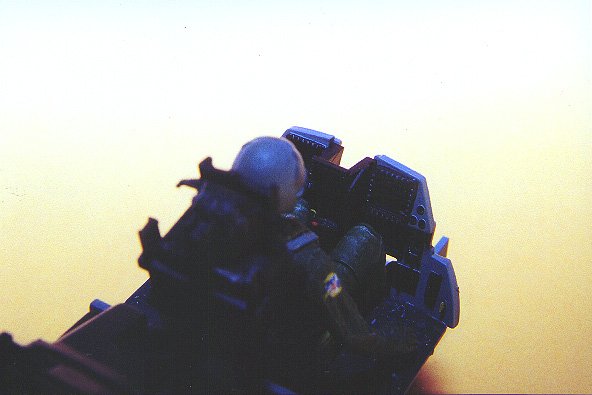
The 'Front Office'
As is the norm, I began work on the cockpit first. This kit has a beautifully appointed
cockpit, with CRT screens represented by decals. I painted all of the side consoles
separately, and set them aside for later. The instrument panels were completed, and after
the decals were applied to the back of the CRT screens, a coat of flat black was applied
over them on the back side to prevent any light from getting through (CAUTION: The glue is
actually on the back side of the CRT decals, so in order for them to read correctly, you
have to apply them to the back of the glass with the adhesive side AWAY from the glass.
This makes adhesion a little tricky, and the coat of paint over them also helps to insure
that they will stay in place). The cockpit was then assembled per the kit's instructions, the pilot and WSO were
painted and attached to the seats, and then cemented into the cockpit floor after screwing
in the nose gear bay to the underside of the cockpit. Lead foil was used to fabricate seat
belts for the pilots, and upon completion, the cockpit was attached to the forward
fuselage, and the fuselage halves were closed up.
The Airframe
Once I was 'over the hump' (for me, 'over the hump is completing the cockpit and
installing it), I went ahead with construction of the airframe. First, the intakes and
exhausts were completed and painted, added to the aft fuselage, and then closing up the
entire assembly. At the same time, I was also busy casting a second fuel tank to display
the model with two wing tanks, so the kit's tank was used as a master for the RTV mold
which I used to cast the second tank. This procedure wound up expending a LOT of my RTV
and resin, so unless you're overstocked in these two items, I'd suggest an aftermarket
tank, or contacting Tamiya for a second one.
The long pylons were then added, as well as the LANTIRN pods, and then the forward/aft
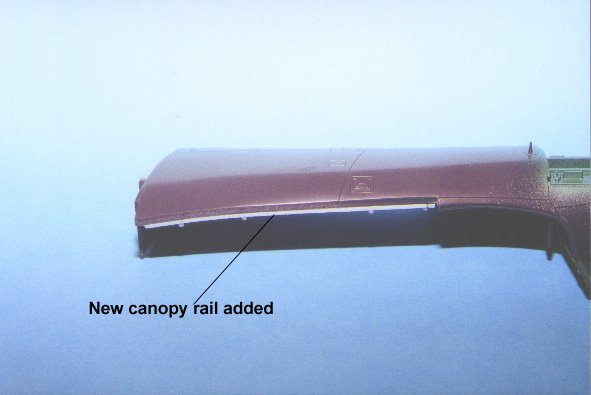
fuselage halves were joined. This is one area where you have to be careful, as there will
be a gap between the parts. I closed this gap with some small pieces of .010 strip, and
trimmed them down after the Tenax had set and the plastic hardened. The nice thing about
this step is that the intakes are movable, so you can get them out of your way while you
work on the joint. The wings were added at this point, and this is one area where there is
a big fit problem. After screwing in the attachment points on the wings, I noticed a large
gap in the wing/body blend, so again, I filled these with .010 strip and trimmed it down.
These gaps were also filled in the same manner on the underside of the wings. Smaller gaps
were then filled in with red auto glazing putty, and topped off with gap filling CA, which
was then sanded and filed to the proper shape. The vertical tails were then added, and the
model was just about ready to paint. Well, almost......
I realized at this point that the nose gear should have been added earlier in
construction, so I was forced to drill two holes in the lower part of the forward fuselage
where the screw and bolt should have went. The nose gear was added and screwed in, and the
resultant holes were filled with small sections of sprue and gap filling CA, which was
then sanded out. Now, the model was ready for the first coat of paint.
The entire model was airbrushed with a coat of Model Master FS36118 (Gunship Gray). This
was set aside to dry, and a few days later, a coat of Future was applied. This is where
the trouble started. The Future coat wound up taking on a very pebbly texture, and I just
wasn't satisfied with the appearance. With a can of Easy -Off oven cleaner and an old
toothbrush in hand, I stripped off the paint, cleaned out the panel lines, and got ready
to start again, this time with a new tactic................
Steve
And this is where we'll pick things up in the next installment.
Follow this link to see:
Part II - Painting and Finishing
Related Links:
Walk Around Photos
|
|